top of page

JOURNAL

...grab your picnic blanket and head outdoors

fashion picnic editorial
Coco beret & Esther camisole

There’s something rather pleasing about dining al fresco on a freshly mowed park grass, with the weather looking to be sunnier by the day: it’s time to start our early spring picnics.

To celebrate picnic season and park life that we all love we asked Pastry Chef Juliana Pascal to create for us a recipe full of spring feel.

strawberries tart recipe
Strawberries in Bloom tartlet


Here, we share Juliana's Strawberries in Bloom Tartlets for you to practice your baking skills.

Oh! Don't forget the bottle of fizz in the fridge... Cheers hun!


hand knitted beret and hand knitted top with sequins
Customisable Coco Beret & Esther Camisole

STRAWBERRIES IN BLOOM TARTLETS

Serves 8

You'll need:

8- 8cm tart tins or rings

8- 5cm silicone half sphere moulds


SABLÉE PASTRY:

180g plain flour

90g cold unsalted butter in cubes

70g caster sugar

25g almond flour, sifted

1g salt

38g eggs

For pastry finishing: 25g of melted cocoa butter (or coconut oil)


STRAWBERRY GEL:

240g of fresh strawberry puree

72g caster sugar

10g lemon juice

10g leaf gelatin

200g clear topping glaze


STRAWBERRY CREMEUX:

130g ripe strawberry puree

3g lemon juice

45g caster sugar

3g leaf gelatin

125g double cream (fresh and cold)


TART FINISHING:

200g fresh sliced ​​strawberries

Q.B. of mirror or nappage glaze

Edible flowers


METHOD:


*SABLÉE PASTRY:


1. To make the pastry, measure the flours, salt, sugar and butter into a processor and with the racket at low speed, whiz until the mixture resembles fine breadcrumbs.

2. Stir in the eggs, then bring together into a smooth dough.


3. Transfer the dough to a box with lid or wrap in clingfilm and leave to rest in the fridge for at least 1hour.

4. Roll out the dough in between two sheets of parchment paper until is 2 to 3mm thick. Line the tart tins or rings and then chill in the fridge for 1hour.

5. Transfer the tarts to the freezer for 30 minutes before baking.

6. Prick the bottom of your tarts with a fork. Bake in a preheated oven at 160ºC, for about 20 minutes or until the tarts are golden brown.


7. Remove and brush cocoa butter (or melted and warm coconut oil) all over the inside to waterproof them. Set aside to cool.


*STRAWBERRY GEL:


1. Put the gelatine leaves into a bowl of cold water and leave it.

2. Place the strawberry puree, sugar and lemon juice into a pan and set over a low heat. Stirring constantly, until the mixture reaches 80ºC.

3. Turn off the heat, squeeze the water from the gelatine leaves and add them to the hot strawberries mixture. Stir until dissolved.

4. Place the strawberry gel into eight silicone half sphere moulds, about 30g in each mould. Freeze.


*STRAWBERRY CREMEUX:

1. Put the gelatine leaves into a bowl of cold water and set aside.


2. Place the strawberry puree, sugar and lemon juice into a pan and set over a low heat. Stirring constantly, until the mixture reaches 80ºC.

3. Turn off the heat, squeeze the water from the gelatine leaves and add them to the hot mixture and mix well until is completely homogeneous.

4. Transfer the mixture to a bowl and set aside.

5. Whip the double cream to soft peaks. When the strawberry mixture reach 32ºC, add 2 large tablespoons of the whipped cream to the strawberry and gelatine mixture and stir in gently. Carefully fold in the rest of the cream until the mixture is smooth and light.


6. Immediately pour into the 8 tartlets bases, filling them to the edge. Place in the fridge or freezer until well set and firm.


FINISHING:


1. Thinly slice the strawberries. Spread a little mirror or nappage glaze in a bowl and gently wrap the strawberry slices in the gel.

2. Remove the strawberry gel half spheres from the moulds. Gently coat them with clear topping glaze. Place one half sphere on top of each tart center.

3. Place the strawberry petals around de sphere.

4. Finish with mirror or nappage glaze and edible flowers.


Strawberry and flowers tartlet recipe
Strawberry in Bloom Tartlet

Strawberries and flowers are a Spring classic but feel free to try it with raspberry or other berry you like. They are all absolutely delicious!


hand knitted top with  large sequins
Esther camisole


pastry chef Juliana Pascal from São Paulo, Brazil
www.julianapascal.com.br

Meet our bff & Chef: Juliana Pascal


Originally trained as a lawyer by the Mackenzie University, Juliana soon found herself chasing the fragrance of freshly baked bread and tarts to the Superior Course of Technology in Confectionery and Bakery at the Anhembi Morumbi University in São Paulo.

Graduated as a pastry chef, she went to the US and studied Artisanal Bakery at the San Francisco Baking and in Confectionery at the École Valrhona in New York.

After that she went to Italy and specialised in Gelato Manufacturing at the Carpigiani Gelato University in Bologna, and in Bakery at the Centro di Ricerche and Svilupo Agugiaro & Figna in Padova.

Back in Brazil, she studied Flour Technology at ITAL in Campinas. She has been teaching baking & confectionery classes for over 12 years at several universities, training courses and institutions in the gastronomy area. Juliana also advises and trains at a corporate level.


Photographer: Dafne De La Fuente

Recipe and food pics: Juliana Pascal


Vera wears: Esther Camisole and Koi bag

Ginebra wears: Customisable Coco Beret and Koi bag

Visit our STORE to see much more!

Fashion Picnic Editorial, handmade and sustainable fashion
Koi bag, Coco Beret & Esther Camisole


Red velvet, originally a classic southern-American recipe, is a superb chocolate cake alternative, something a little different and is perfect for the festive season. Here we share Georgina Hayden's "fail-safe" recipe.


ingredients baking Red Velvet cake
Esther black headband & Ginny jumper

RED VELVET CAKE WITH CREAM CHEESE ICING


Serves 12 to 16

250g plain flour 1 ¼ teaspoons bicarbonate of soda 40g cocoa powder 240ml vegetable oil (or any flavourless oil) 300g golden granulated sugar 2 large free-range eggs 2 tablespoons red food colouring ½ tablespoon good quality vanilla extract 100ml freshly brewed coffee, cooled 240ml buttermilk ½ tablespoon white wine vinegar 175g unsalted butter, at room temperature 400g icing sugar 300g full-fat cream cheese


1- Preheat your oven to 180ºC/350F/gas 4. Grease 3 x 8” sandwich tins and line the bases.

2- Sift the flour, ½ teaspoon of fine salt, bicarbonate of soda and cocoa into a large bowl and leave to one side.


3- Pour the oil into the bowl of a freestanding mixer and add the granulated sugar. Gently beat together for a couple of minutes, until pale.


4- Add the eggs, beating them in one at a time, and then mix in the red food colouring and vanilla extract.


5- Spoon in ⅓ of the sifted flour mixture, and mix together. Mix together the cooled coffee and buttermilk, and add half to the mixing bowl. Beat it in, then beat in half the remaining flour.


6- Stir the white wine vinegar into the remaining buttermilk and pour it into the cake mixture. Beat it in well and finish by folding in the last of the flour.


baking red velvet
Miranda headband & Ginny Jumper

7- Beat everything together well, then evenly divide between the tins. Bake in the oven for around 35 to 40 minutes, or until cooked through and a skewer comes out clean. Leave to cool in the tins for 10 minutes, then transfer to a wire rack and leave to cool completely. (If your cakes are a little domed, that’s great, slice off the excess sponge and keep it for decorating later).


8- To make the cream cheese frosting, cut the butter into chunks and place into the bowl of the freestanding mixer (or use a mixing bowl and electric whisk), and beat with the paddle attachment for 2 minutes until very pale and creamy. Sift the icing sugar into the bowl in 3 stages, beating it well in between until smooth.


9- Drain any excess liquid off the cream cheese – I spoon it into a sieve to drain it completely. When all the icing sugar has been incorporated, spoon a large tablespoon of the cream cheese into the bowl and beat it in, scraping the mixture off of the sides as you go. Add half of the remaining cream cheese, beat it in for 30 seconds, scrape the sides of the bowl again and add the remaining cream cheese.


10- Beat rigorously for a minute or two. It’ll look like liquid at first, then it’ll come together and appear light and whipped. Be careful not to beat the icing too much though, otherwise it will end up runny again. Spoon into a bowl and pop into the fridge for half an hour to firm up a little.


11- Dot a teaspoonful of the cream cheese icing onto your chosen cake stand or board and top with one of the cakes. Dollop a couple of large spoonfuls of icing into the middle of the cake and evenly spread it to the edges, leaving a bit of a border, as it’ll ooze a little when you place the next sponge on top.


Baking Red Velvet cake
Esther headband & Ginny Jumper

12- Keep going until all the sponges have been layered up and finish by decorating with the remaining icing. I like to have a scant layer around the outside, so that you see all the layers through, but apply it as thickly as you like (make extra if you want to finish it with a piped pattern).


13- Decorate by crumbling up any offcuts of the sponge, then sprinkle around the top edge of the cake.Or add some fresh fruits.


Red Velvet
Red Velvet

Model: Ginebra Canas

Recipe: Georgina Hayden from Jamie Oliver's team

Ginebra wears: Custom made Ginny Jumper (custom made), Esther Black headband, Miranda headband, Esther headband in natural


Here are some facts and benefits that, maybe, you've never thought about your wool jumper or beanie:


Did you know that wool fibre is 100% natural and biodegradable?

Oh yes! It's grown naturally on millions of free sheep around the world, consuming a simple diet of fresh air, sunshine, grass, and water.

After well-worn, your beanie, jumper, or socks will naturally decompose in the soil, slowly bringing back into the earth some good and valuable nutrients.


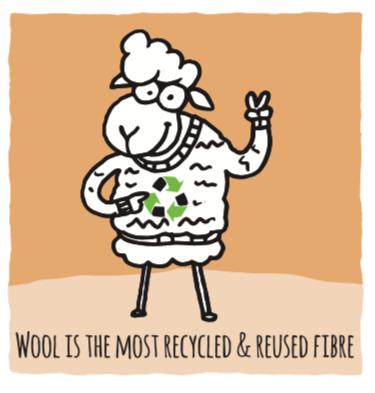
Wool is one of the most suitable fibres to recycle and reuse.

Your well-worn woollen garments can be recycled to become the basis for mattress padding, insulation, upholstery, and new knitted pieces.


Wool is naturally flame-resistant, no need for additional chemicals.

Wool never melts or stick to the skin when it burns.

That's why it's a trusted natural fibre in public areas such as hotels, hospitals, and theatres.


Sheep are part of the natural carbon cycle.

The carbon in wool is derived from the digestion of plant material by sheep. Means that the carbon that would be liberated into the atmosphere is stored instead in their wool.


In contrast to synthetics fibres, wool is naturally breathable.

Absorbs moisture and keeps skin dry, reducing the amount of body odour that is caused by sweat and its contact with any bacteria on the body.


Unlike any other textile fibre, wool can be refreshed simply by hanging them outside in a shady place in fresh air, saving water, detergent, and energy...

Make sure woollies are clean before storing because wool is a delicacy to moths and bugs. There are many natural bugs repellents available to prevent any damage.


For more info about Care, Store & Love go to How To Wash Wool At Home.


illustration: Didiu Rio Branco


bottom of page